Scope
Create a reverse proxy using SWAG that use a domain registered on Azure DNS Zone.
Requirements
- Domain (a domain can be bought on namecheap for few $/€)
- Azure Account
- Azure VM (not mandatory but highly suggested)
Azure setup
Create DNS resource
- Navigate to the Azure portal .
- On the Home screen click
Create a resource button.
- In the search box type
dns zone.
- Select
DNS zone and click Create button.
- On the Basic tab:
- Resource Group: click
Create new and enter the name you like or select existing one.
- Name: enter dns zone name: e.g.
reverseproxynet.xyz.
- Resource group location: automatically select, or select region closest to you (check this or this).
- Click
Review + create
- When DNS zone resource is created navigate to it. On the Overview page you will see list of name savers (1 to 4), that need to be copy/pasted to the your’s domain registrar (e.g: namecheap).
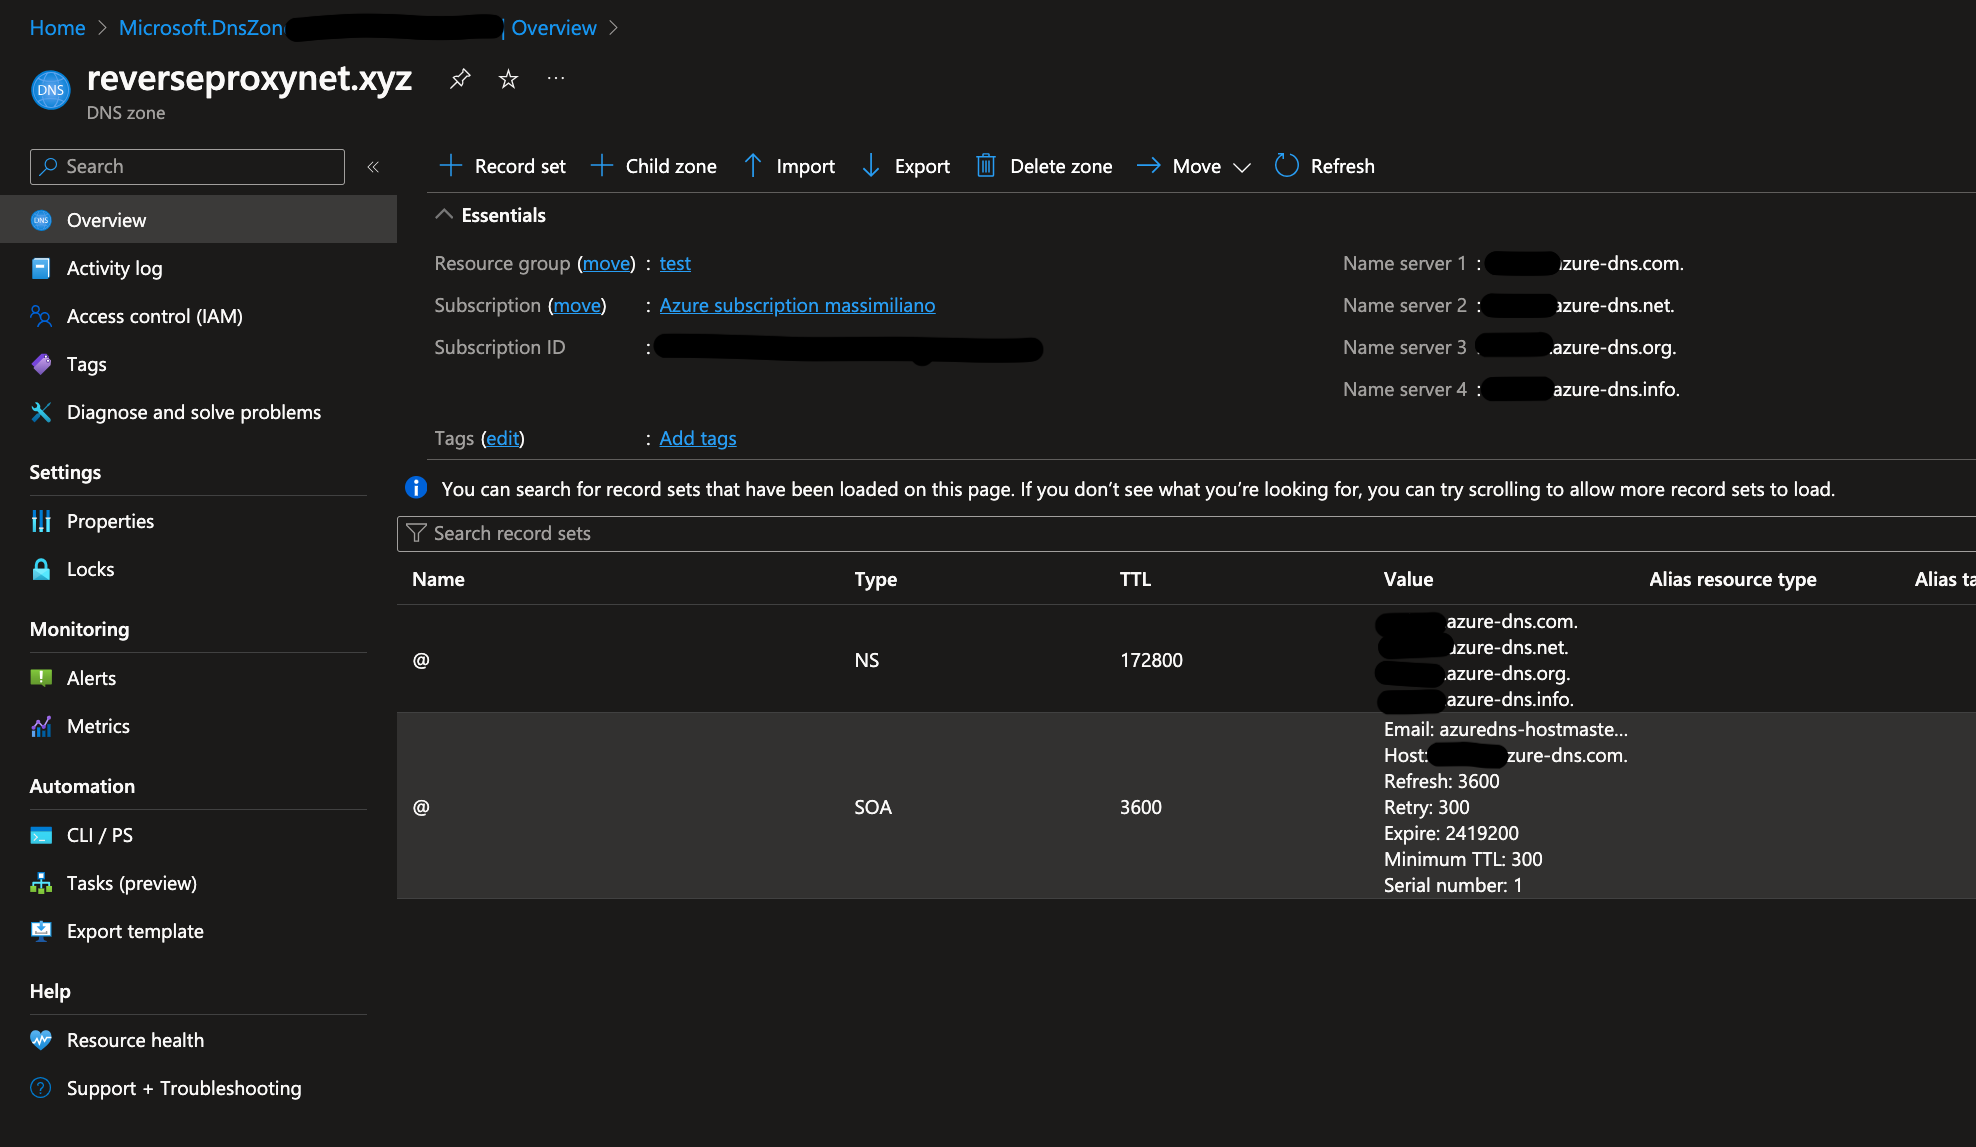
Create Domain Registar
- Go to Namecheap and select:
Domain List-> Domain.
- In
NAMESERVERS section, select the Custom DNS option from the dropdown menu. Now copy all four name servers from the Azure DNS zone resource created on previous section.
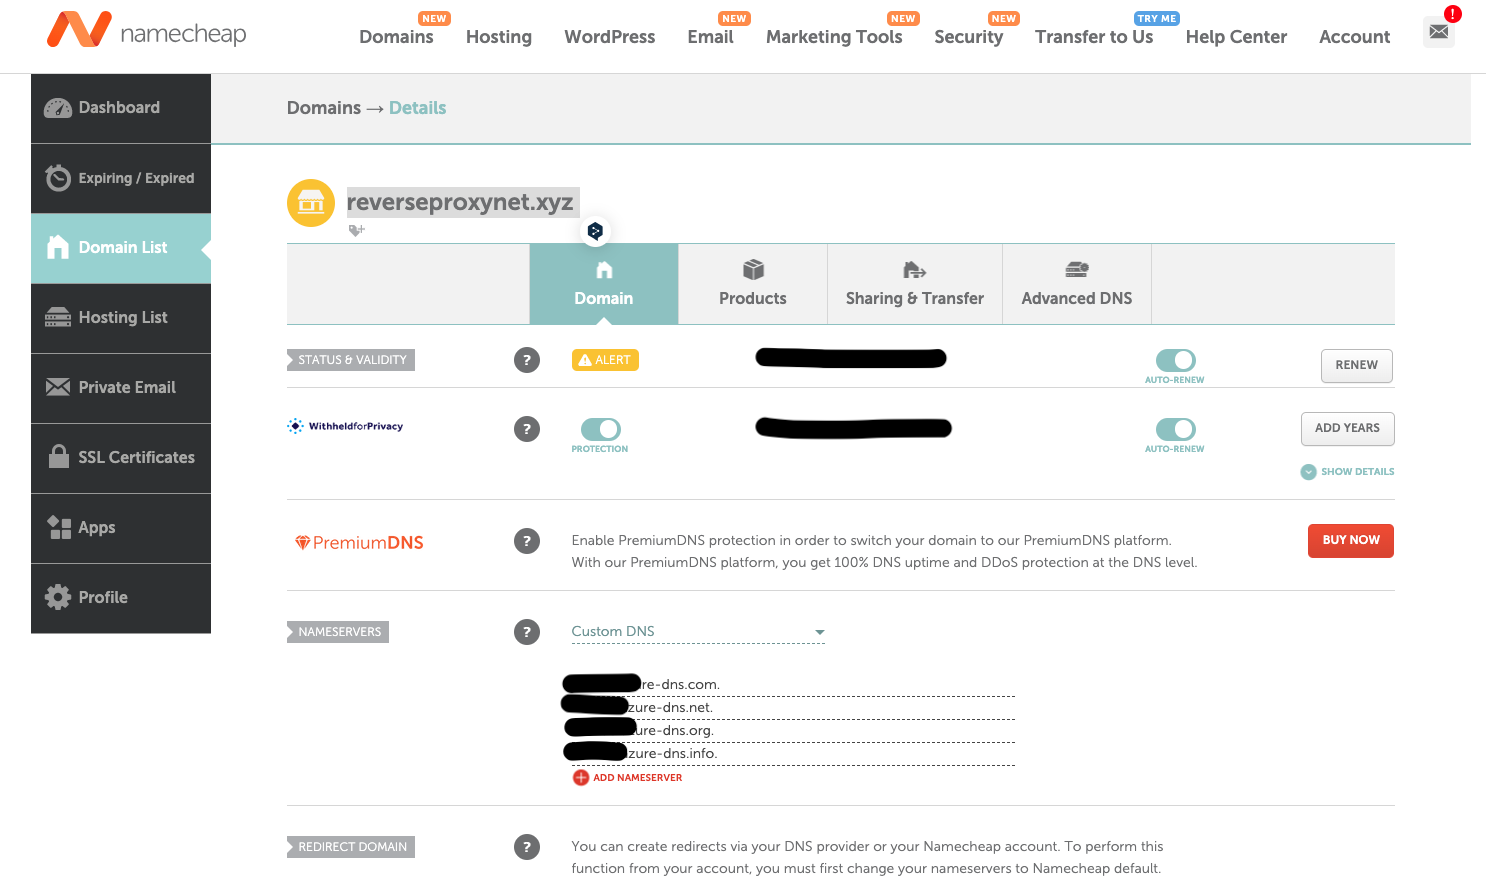
- Wait few minutes for nameserver to propagate.
- You can check if name servers were applied, by calling command below:
nslookup -type=SOA libertus.dev
In the response you should see origin that points to one of the Azure DNS name servers we specified above, if it is not just try in a few minutes.
...
massimilianorighi@KrakaMacBookPro ~ % nslookup -type=SOA reverseproxynet.xyz
Server:		192.168.5.1
Address:	192.168.5.1#53

Non-authoritative answer:
reverseproxynet.xyz
	origin = ns1-XX.azure-dns.com
	mail addr = azuredns-hostmaster.microsoft.com
	serial = 1
	refresh = 3600
	retry = 300
	expire = 2419200
	minimum = 300

Authoritative answers can be found from:
...
It is now possible control your domain via Azure portal, automate scripts and/or your application logic.
Create Subdomanin
- Obtain the public IP address for you server (for Azure VM this can be found on the VM
overview section).
- Go to the domain registrar (Azure DNS Zone) and create
A record:
- Click
+ Record set button.
- Enter Name: e.g.
whoami and www.
- Select Type::
A - Alias record.
- Enter IP address: -> your VM Public IP address <-.
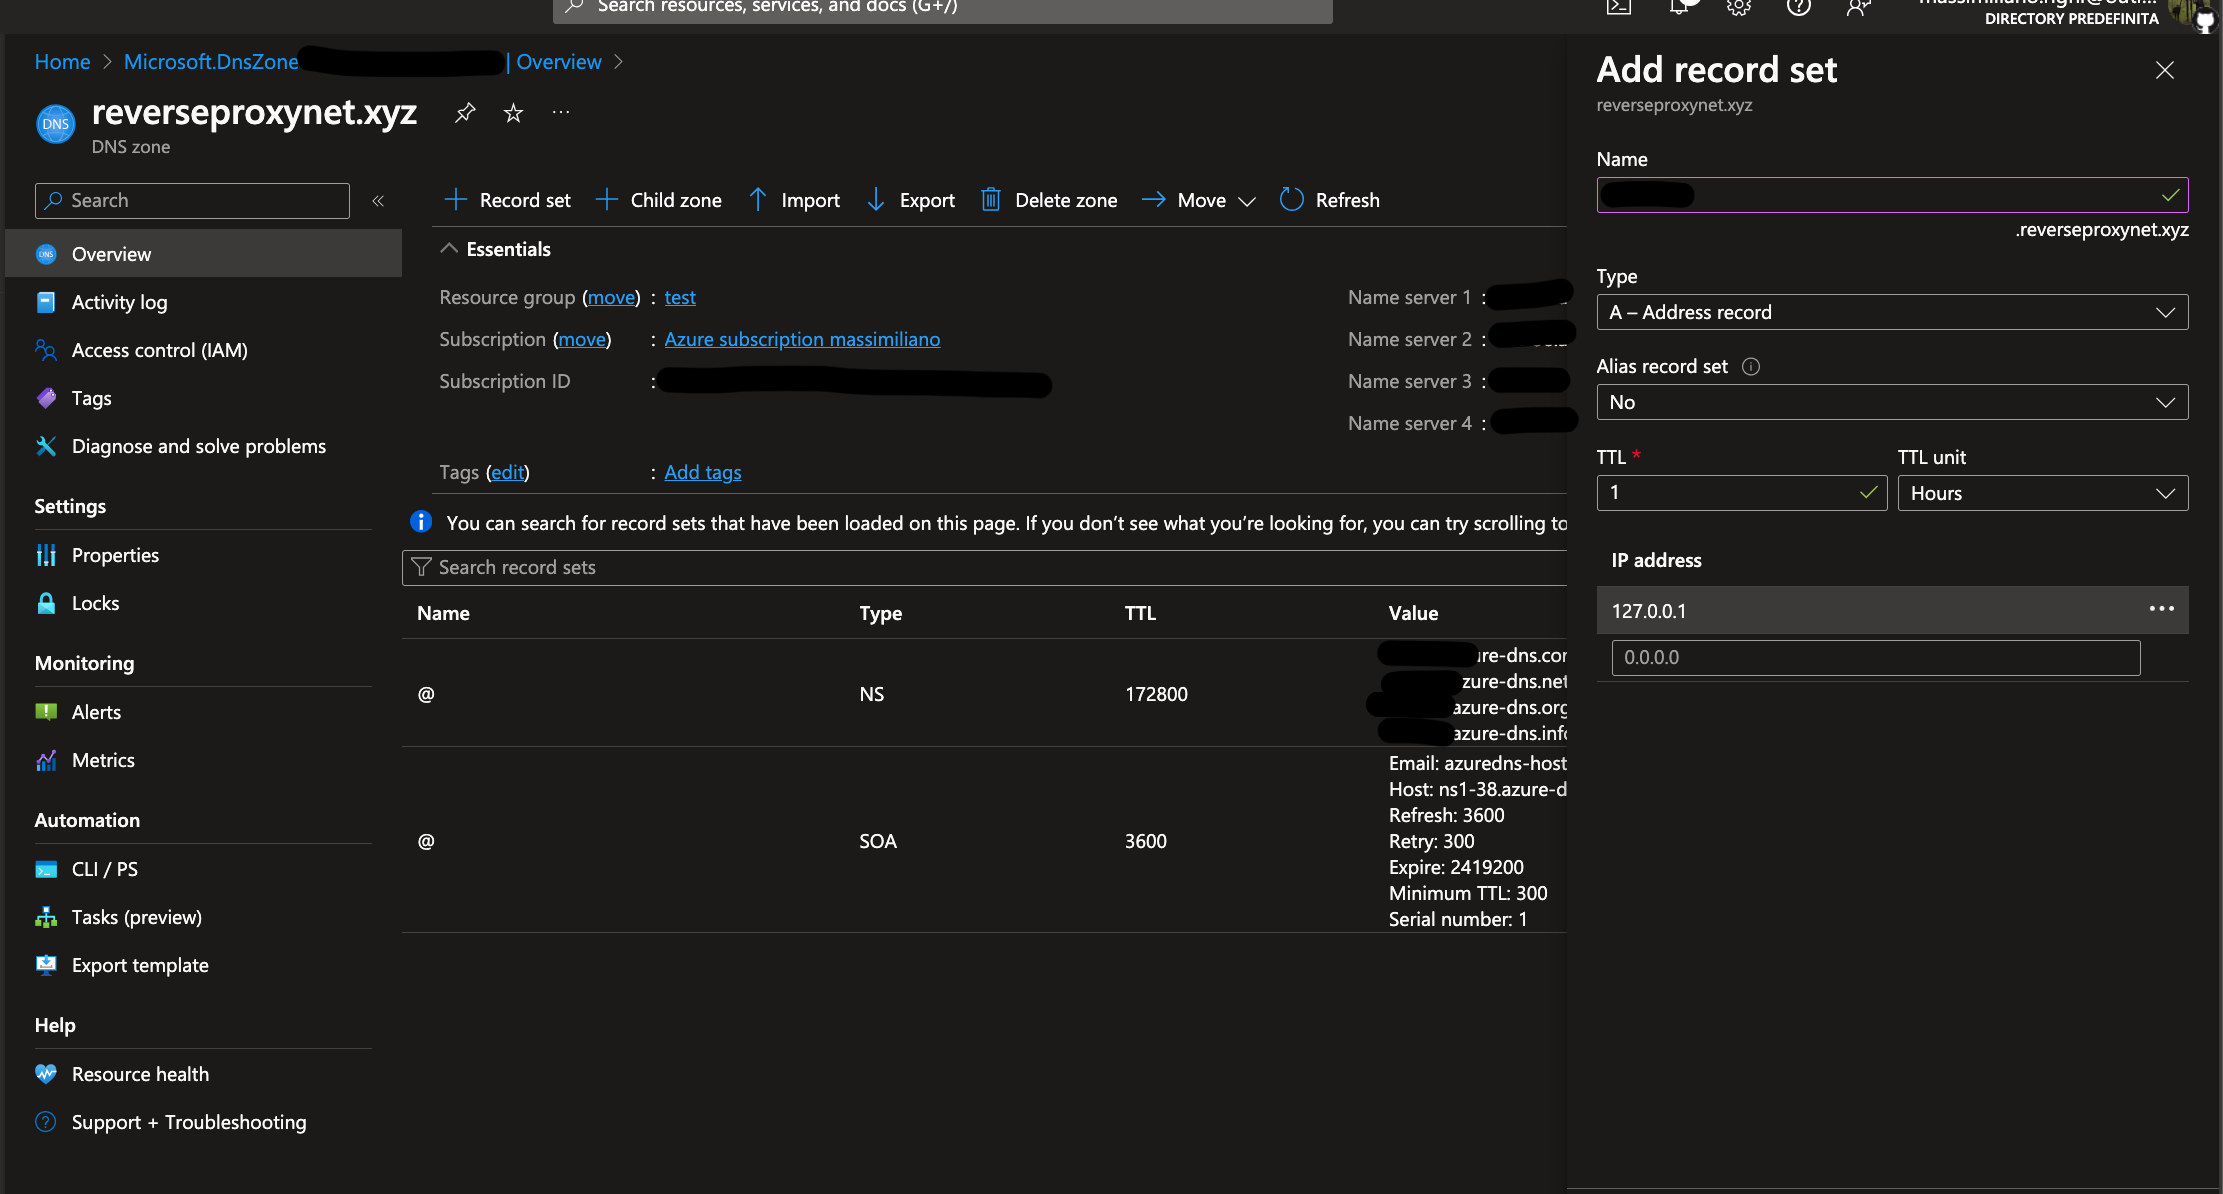
SWAG support http or DNS validation. The DNS challenge is a bit more tricky than HTTP, because it requires access to your DNS provider via API. SWAG needs to access the DNS provider via API, in order to create a DNS TXT record, and then Let’s Encrypt can use it to validate the subdomain ownership.
In this case Azure is the DNS provider. We now need to create an azure application that will be used by SWAG, Traefik or whatelse to get access to the Azure DNS Zone.
SWAG DNS configuration for Azure requires the following inputs:
- dns_azure_sp_client_id
- dns_azure_sp_client_secret
- dns_azure_tenant_id
- dns_azure_environment
- dns_azure_zone1
Let’s find out all these info.
dns_azure_zone1
From DNS Zone page, we need:
- Resource group name: e.g.
test
- Subscription ID: e.g.
beb6bvvd-d251-45be-a1db-f26b87da91e
- DNS Zone name: e.g.
reverseproxynet.xyz
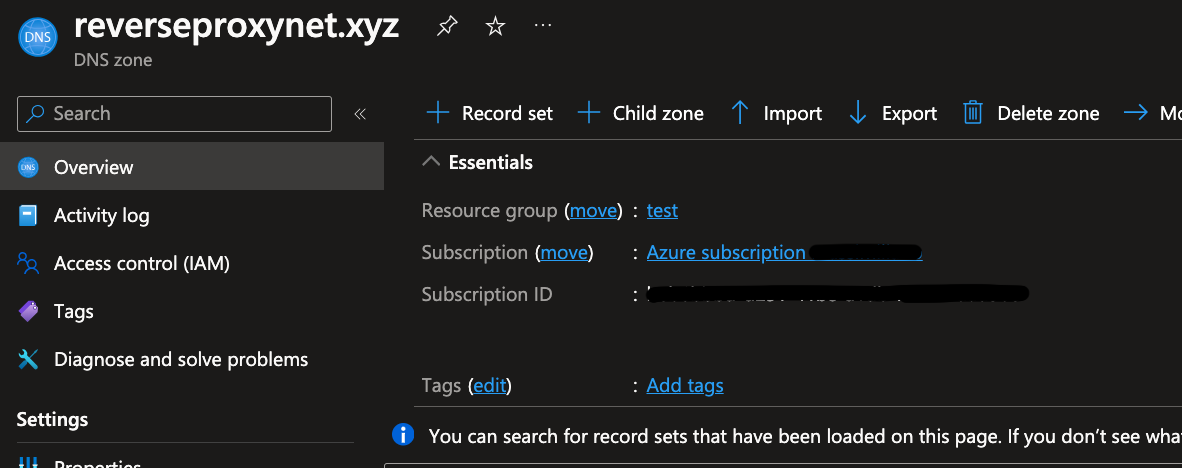
dns_azure_tenant_id
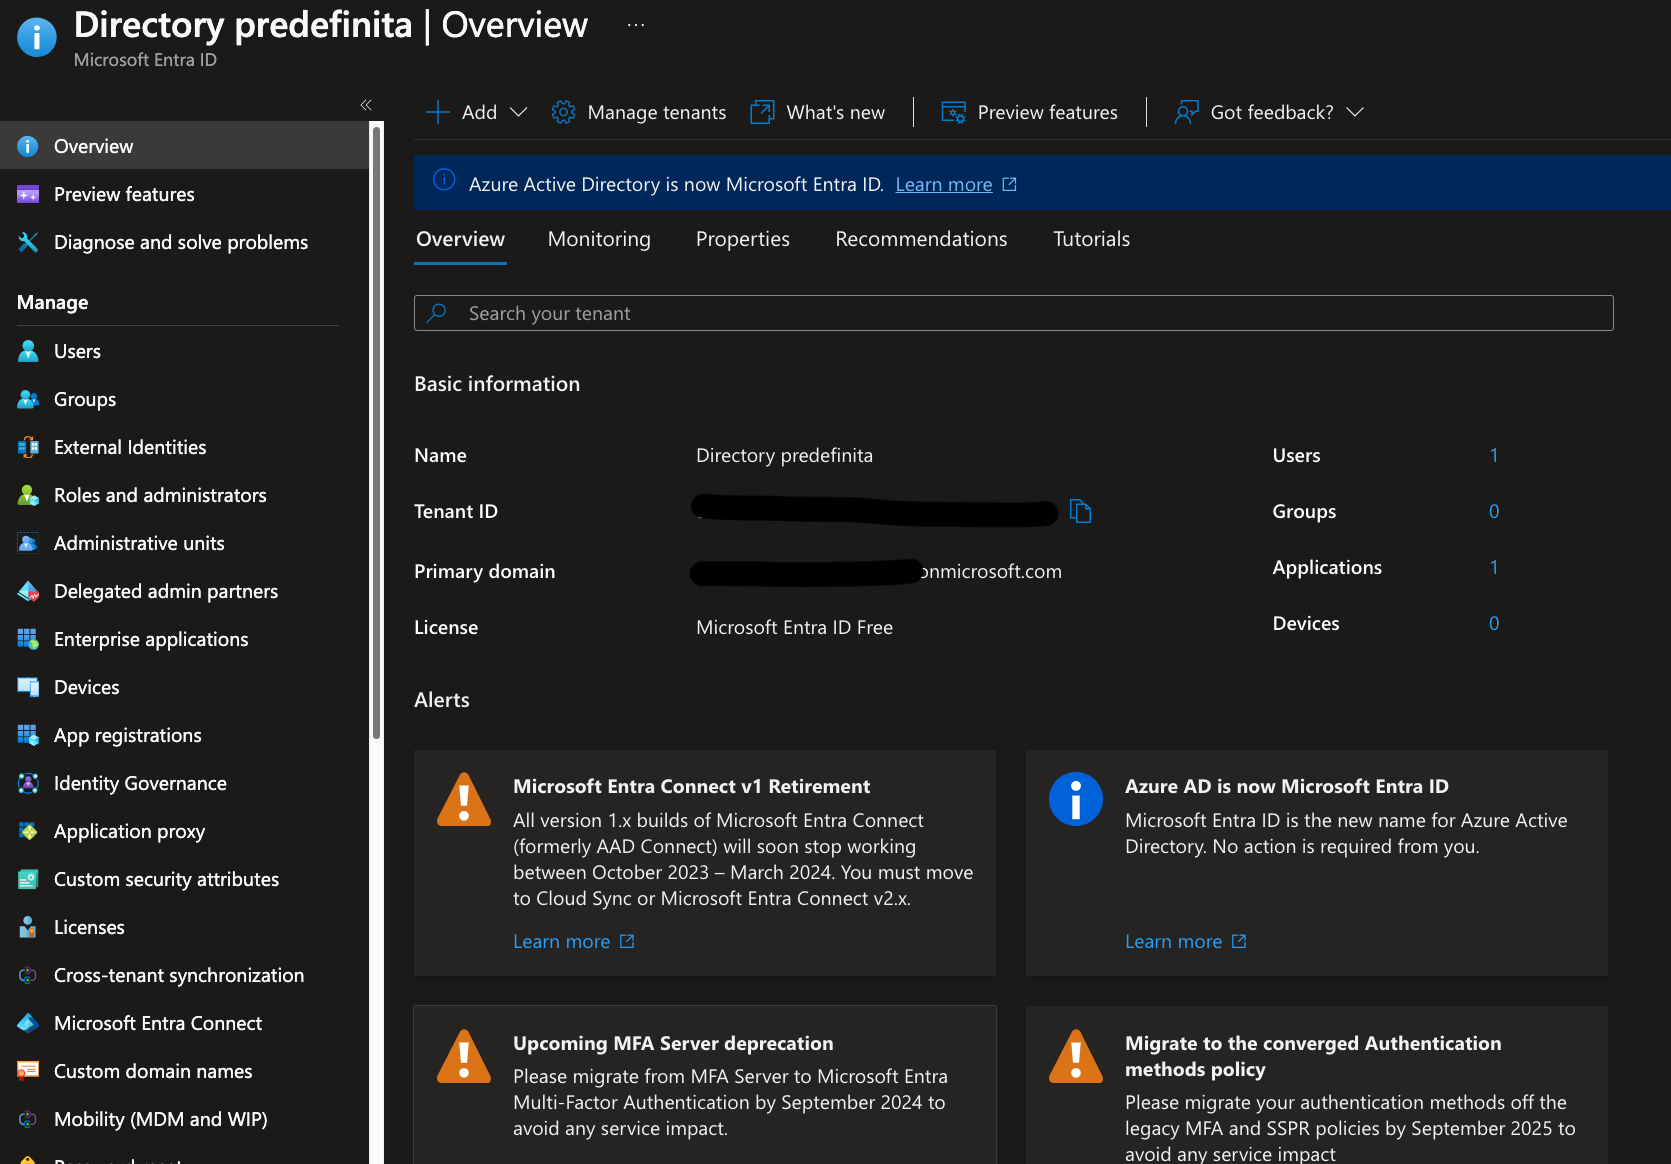
On Azure portal search for Microsoft Entra ID, then you should see a page like the one below that contains basic information about your tenant.
- Tenant ID:
d8x72dd3-f729-4fe1-0f6e-12dcb6c82d5c
dns_azure_sp_client_id and dns_azure_sp_client_secret
We need to create an Azure App to have these two information.
Steps:
- Go to
Microsoft Entra ID
- On the left panel, select
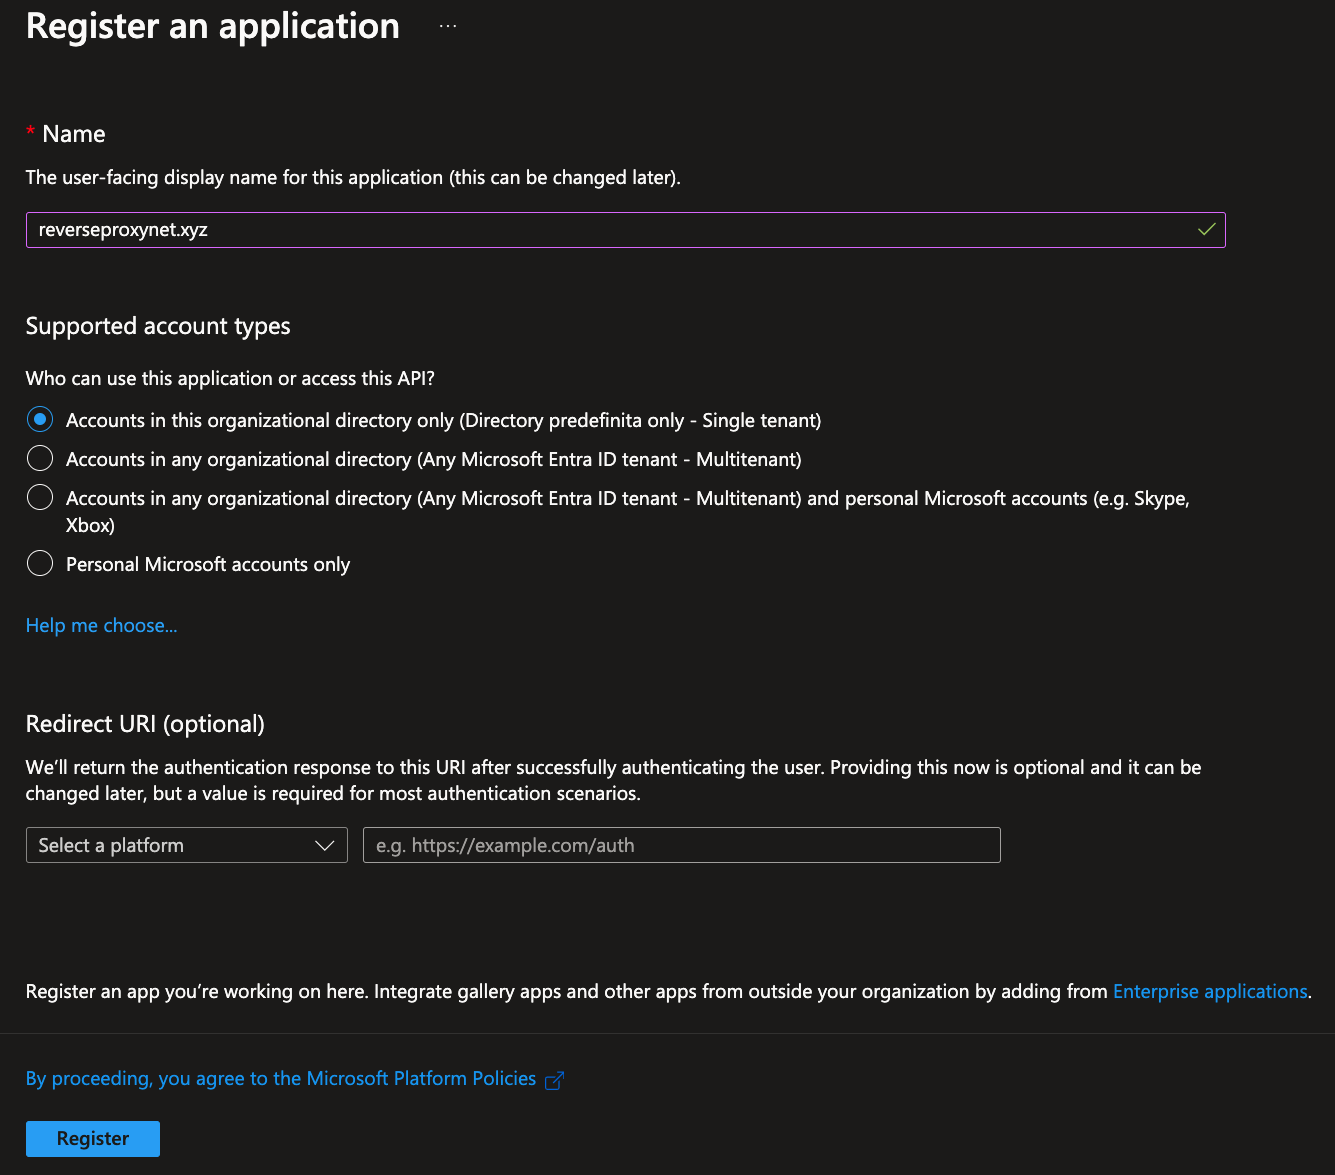
App Registrations
- Click
New Registration button.
- Enter Name
- Select the longest expiration as possible (if it stops working all services will be blocked! Keep note of the date, and remember to update it!)
- Click
Register button.
- On the Overview tab of just created app, copy the
Application (client) ID.
- dns_azure_sp_client_id = e.g.
689264e4-5e48-172f-a584-dd4124c57c29
- Go to the
Certificates & secrets tab on the left
- Click New client secret to generate a secret key.
- Copy new secret
Value to dns_azure_sp_client_secret:
- dns_azure_sp_client_secret: e.g.
EnG9Q~5tG2Z-_Fi0nZOabmkvaAMxcgBX_YPcOaAo
Assign permission
One more thing is left, we need to assign permissions to just created app.
- Go to your subscription
Overview page.
- Select
Access Control (IAM) tab.
- Click
+Add button.
- Select
Add role assignment option.
- In the search box, type
dns.
- Select
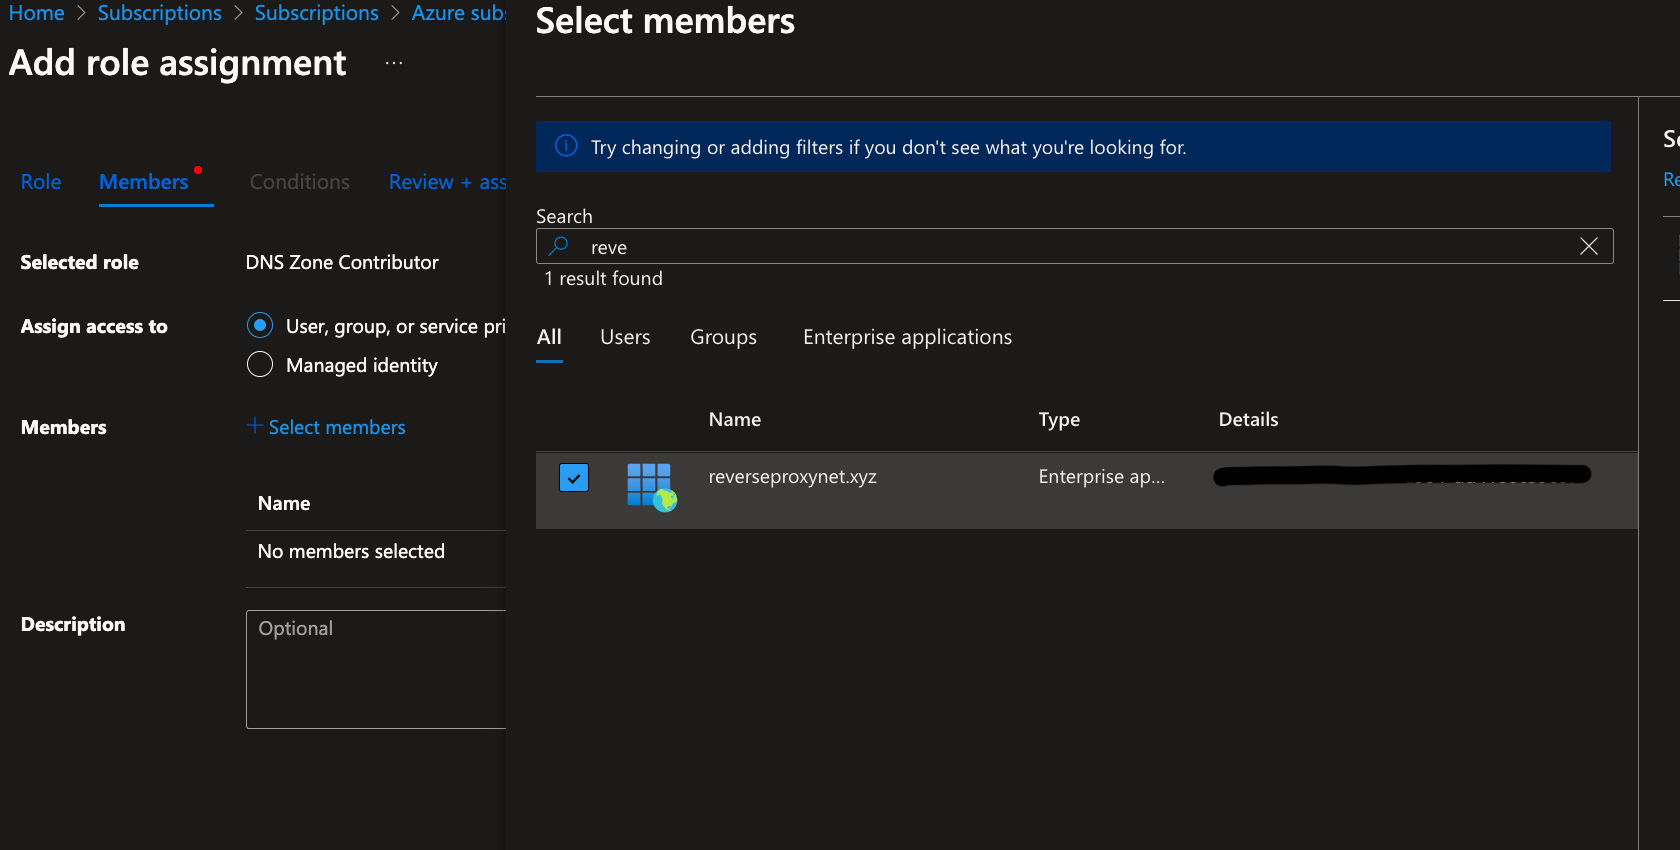
DNS Zone Contributor role.
- Click
Next button.
- Click
+ Select members button.
- In the search box type app name you created above and select it (in this example is:
reverseproxynet.xyz).

- Click
Review + Assign button.
SWAG Configuration
- Deploy the swag container:
    version: "3.8"
    services:
        swag:
            image: lscr.io/linuxserver/swag:latest
            container_name: swag
            cap_add:
               - NET_ADMIN
            environment:
               - PUID=1000
               - PGID=1000
               - TZ=Europe/Rome
               - URL=reverseproxynet.xyz
               - SUBDOMAINS=wildcard
               - VALIDATION=dns
               - DNSPLUGIN=azure
               - EMAIL=<myemail@reverseproxynet.xyz> #optional (doesn't need to be related to domain)
               - DOCKER_MODS=linuxserver/mods:swag-auto-reload
            volumes:
               - swag_data:/config
            ports:
               - 443:443
               - 80:80
            extra_hosts:
               - reverseproxynet.xyz:127.0.0.1
            restart: unless-stopped
    volumes:
        swag_data:

    networks:
        default:
            name: proxynet
            external: true
- Now that the container is running, navigate to the volume “swag_data” (for example vscode with docker extension). From the volume edit
azure.ini:
nano /config/dns-conf/azure.ini
Here we need to configure the Azure information created before: dns_azure_sp_client_id, dns_azure_sp_client_secret, dns_azure_tenant_id, dns_azure_environment, dns_azure_zone1.
For example using all the credentials extracted before:
# Instructions: https://certbot-dns-azure.readthedocs.io/en/latest/
# Replace with your values
# dns_azure_environment can be one of the following: AzurePublicCloud, AzureUSGovernmentCloud, AzureChinaCloud, AzureGermanCloud
# Service Principal with Client Secret
dns_azure_sp_client_id = 689264e4-5e48-172f-a584-dd4124c57c29
dns_azure_sp_client_secret = EnG9Q~5tG2Z-_Fi0nZOabmkvaAMxcgBX_YPcOaAo
dns_azure_tenant_id = d8x72dd3-f729-4fe1-0f6e-12dcb6c82d5c
dns_azure_environment = "AzurePublicCloud"
dns_azure_zone1 = reverseproxynet.xyz:/subscriptions/beb6bvvd-d251-45be-a1db-f26b87da91e/resourceGroups/test
NOTE: dns_azure_zone1 is made in this way: <domain>/subscriptions/<subscription-id>/resourceGroups/<resource-group-name>
- Restart the docker container:
docker restart swag.
- If everything is setup correctly and all the above steps has been correctly performed, by reaching the domain with the browser:
https://<YOUR-DOMAIN> you should visualize the SWAG landing page.
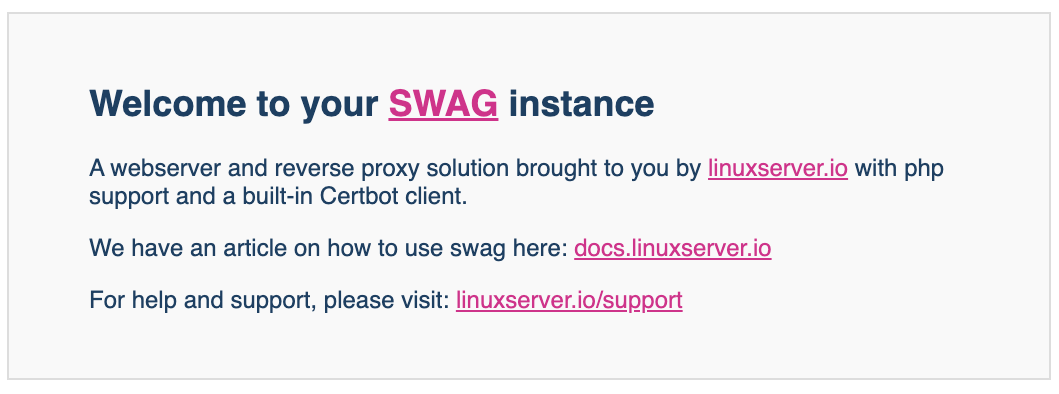
Final NOTE: If you want to change the aspect of the SWAG landing page (with 404 page or something else), just change the HTML page inside the swag_data volue: ./config/www/index.html.
Info and example here.